Iced Biscuit Top Tips
Sometimes people want something sweet and personalised for a special occasion, but a large cake or cupcakes aren’t a practical option for transportation, storage or serving reasons. So Iced Biscuits are often the perfect solution!
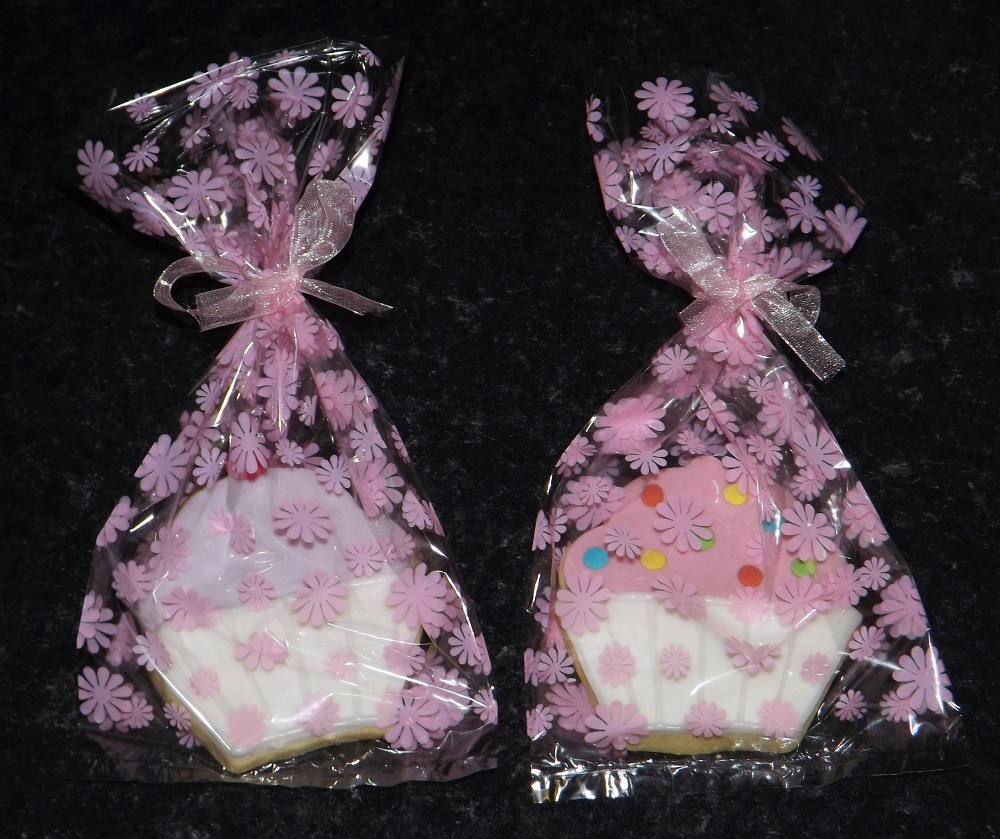
Once the icing has set hard on iced biscuits, they can be wrapped in small cellophane bags so they can be given out as favours, or carefully stacked, separated by baking paper in an airtight box making them very easy to store and transport. And if stored correctly they can last for weeks, so they are a very handy option if you’re looking for something that can be made a few days in advance of an event.

Here is my Iced Biscuit Recipe and here are my top tips for baking and decorating iced biscuits.
Biscuit Baking Tips
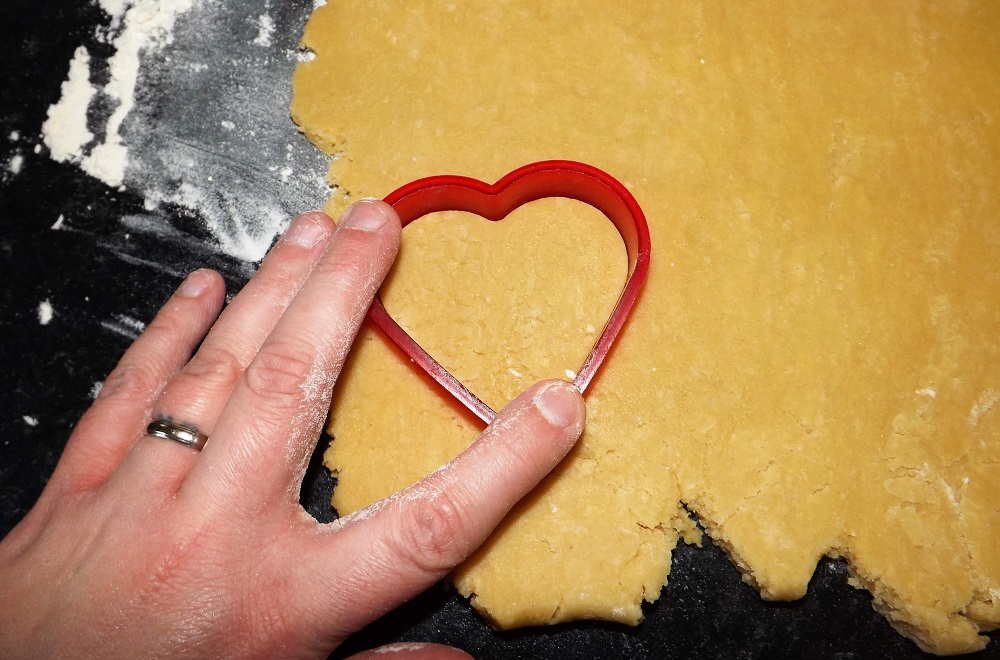
- Always make sure you chill your dough for at least 30mins before you cut out your biscuits and then once you have cut them out and placed them on the baking sheet, make sure you chill them again for another 15mins before baking.
- Rolling your dough out between 2 sheets of baking paper can stop it from sticking to the rolling pin and give them a nice smooth finish.
- Using spacers on your rolling pin can help to ensure your biscuits are a uniform thickness and they will then bake more evenly.
- Always keep a close eye on your biscuits as they bake because they don’t take long and you want to take them out before the edges start to go brown when they are a nice golden colour all over.
- If possible use 2 baking sheets on rotation as you should never place raw biscuit dough on a hot or warm tray.
- Once you remove your biscuits from the oven, allow them to rest on the baking sheet for a couple of minutes Before transferring them to a cooling rack.
- Always make sure your biscuits are completely cool before you start icing them.
- Once your biscuits are completely cool, you can freeze them so they can be iced at a later date. Freeze them flat on a baking tray and then once frozen you can transfer them into a box or bag to make them easier to store. To defrost them, just place them back on the baking tray and leave to thaw at room temperature before icing.
Biscuit Decorating Tips

- Once you’ve filled your piping bag, stand it tip down in a glass with a piece of wet kitchen towel in the bottom. This will stop the icing from leaking out whilst also stopping the icing from drying out in the tip and clogging it up.
- When piping your outlines it is vital to make sure that your icing is a good piping-consistency. It needs to be thick enough to hold it’s shape after it’s piped, but thin enough that you can pipe long smooth lines without them breaking. It is also important to make sure that the two ends of your outline join properly to ensure none of the flood icing can escape.
- When using the flood icing to fill your outlines, start from the outside and work towards the middle of the biscuit working as quickly as possible to ensure it dries evenly.
- As soon as you have finished the flood work gently shake the biscuit from side to side to remove any air bubbles and if any stubborn ones remain, pop them with a cocktail stick and shake it again until they disappear.
- If you want to add a pattern such as polka dots to the biscuits, you can do this by piping them onto the flood icing immediately before it has a chance to dry. The dots will then sink into the flood icing leaving you with a smooth polka dot finish.
- If you are adding extra details on top of the flood icing, always make sure you wait until it is fully dry before icing on top of it or you will end up with a blurry mess. It should take at least 4hrs for them to be fully dry.
- If you’re trying to create a complex design or pipe words on top of the flood icing, draw it first with an edible pen so you have guidelines to pipe over. Again, you MUST make sure the first coat of icing is properly set before you attempt to write on it or you will ruin them.
- When colouring your icing, try and make the colours a little bit darker than you actually want them as they often look lighter when they’re dry.
- When your biscuits are finished make sure they are completely set before you store them or they will stick to the bags or baking paper and all your hard work will be ruined.
- If you aren’t very confident with piping Royal Icing, you can always decorate your biscuits with sugarpaste instead. Simply use the same cookie cutter to cut out a thin layer of paste and attach it to the biscuit with a small amount of edible glue.